Creating custom soap boxes with a logo is an essential step in branding and packaging your products effectively. A well-designed soap box not only protects your soap but also enhances its visual appeal, making it stand out in a competitive market. This guide will walk you through the process of creating soap boxes from scratch, ensuring they align with your brand’s identity and attract customers. Shop now and grab the best deals before they’re gone!
1. Choosing the Right Material for Soap Boxes
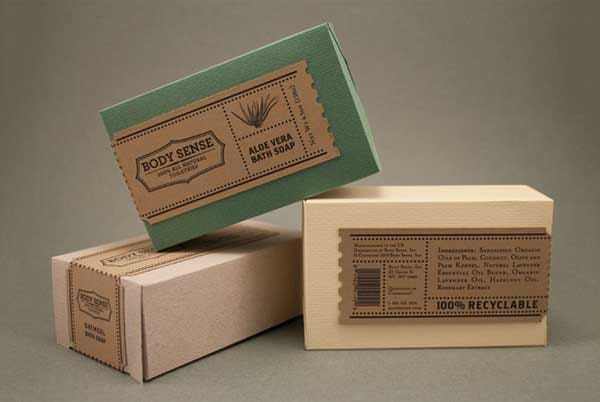
The material you select for your soap boxes plays a crucial role in their durability and aesthetics. Some popular choices include:
-
Kraft Paper – Eco-friendly and biodegradable, ideal for organic and handmade soaps.
-
Cardboard – Sturdy and customizable, perfect for printed designs.
-
Corrugated Board – Provides extra protection for fragile or premium soaps.
-
Rigid Boxes – Premium packaging for high-end soap products.
Selecting the right material depends on your brand’s image and the level of protection required for your soaps.
2. Designing Custom Soap Boxes with a Logo
To make your soap packaging stand out, incorporating a logo and unique design is key. Follow these steps to create a visually appealing box:
-
Choose a Color Scheme – Match the box color with your brand’s theme.
-
Add Branding Elements – Include your logo, tagline, and brand story.
-
Use High-Quality Printing – Opt for techniques like digital printing, offset printing, or UV coating for a premium look.
-
Include Essential Details – Mention ingredients, usage instructions, and any certifications (e.g., organic, cruelty-free).
-
Die-Cut Windows – Adding a transparent window can showcase the soap’s texture and color.
3. Customization Options for Soap Packaging
Customizing soap boxes enhances their appeal and adds a unique touch. Some effective customization options include:
-
Embossing & Debossing – Creates a textured effect for logos or text.
-
Foil Stamping – Adds a metallic finish to make the packaging more luxurious.
-
Matte or Glossy Finish – Determines the final look and feel of the box.
-
Custom Shapes & Sizes – Choose from rectangular, oval, or uniquely shaped boxes.
-
Eco-Friendly Options – Consider recyclable or biodegradable materials to appeal to environmentally conscious customers.
4. Printing and Assembling the Soap Boxes
Once the design is finalized, the next step is printing and assembling your soap boxes. Here’s how:
-
Select a Reliable Printing Partner – Work with a professional printing company specializing in custom packaging.
-
Choose the Printing Method – Offset and digital printing are the most common options.
-
Ensure Proper Cutting and Folding – Precision in die-cutting ensures easy assembly.
-
Apply Finishing Touches – Add coatings, textures, and any special effects.
-
Package Your Soaps Securely – Place the soap inside and seal the box properly.
FAQs About Custom Soap Boxes with Logo
1. Why should I use custom soap boxes with a logo?
Custom soap boxes with a logo help in branding, making your product more recognizable and professional. They also serve as an effective marketing tool.
2. What is the best material for soap boxes?
Kraft paper and cardboard are the most popular choices as they are durable, customizable, and eco-friendly.
3. Can I order custom soap boxes in bulk?
Yes, most packaging suppliers offer bulk order options, which can help reduce costs while ensuring consistency in branding.
By following these steps, you can create high-quality custom soap boxes with a logo that enhance your brand's visibility and appeal to your target audience. Investing in well-designed packaging is a great way to make a lasting impression in the market.
Comments on “How to Create Soap Boxes?”